Introduction #
AmwalPay WHMCS module is an Omani payment gateway designed to simplify digital transactions for local businesses. It supports card payments, NFC, and e-wallets in a single platform. With AI-powered insights and smart invoicing tools, merchants can streamline payment processing and drive business growth efficiently.
Installation Steps #
Follow these steps to install the AmwalPay module on your WHMCS platform:
- Download Plugin here
- Extract the downloaded
.zipfile into your server’s WHMCS directory:/modules/gateways/amwalpay/ - Log in to the WHMCS Admin Panel.
- Navigate to:
Setup→Apps & Integrations→Browse→Payments - Search for AmwalPay Payment and click Manage.
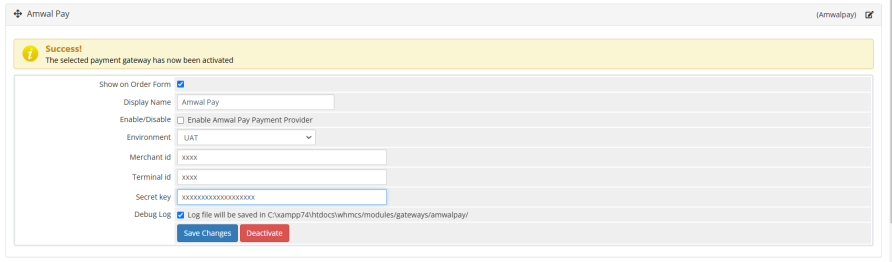
Admin Configuration #
Once the module is installed, proceed with the configuration steps:
- In the WHMCS Admin Panel, go to:
Addons→Apps & Integrations→Payments Apps - Under the Manage Existing Gateways tab, locate and configure AmwalPay.
- Enter the following credentials:
- Merchant ID (provided by Amwal)
- Terminal ID
- Secret Key
- Ensure the correct Environment is selected:
UATfor testingLIVEfor production
- Optionally enable Debug Log to store transaction logs at:
/modules/gateways/amwalpay/ - Click Save Changes to apply the configuration.
Testing the Gateway #
- Set the environment to
UAT - Use test credentials provided by AmwalPay
- Simulate payment transactions in WHMCS
- Once validated, switch to
LIVEfor real payments
Troubleshooting #
IssueResolutionPayment not processedCheck if credentials (Merchant ID, Terminal ID, Secret Key) are correctInvalid environment Make sure the selected environment (UAT or LIVE) matches the credentials Logs not recordedEnsure debug mode is enabled and the directory is writable
Additional Notes #
- Refunds must be managed directly through the Amwal provider dashboard.
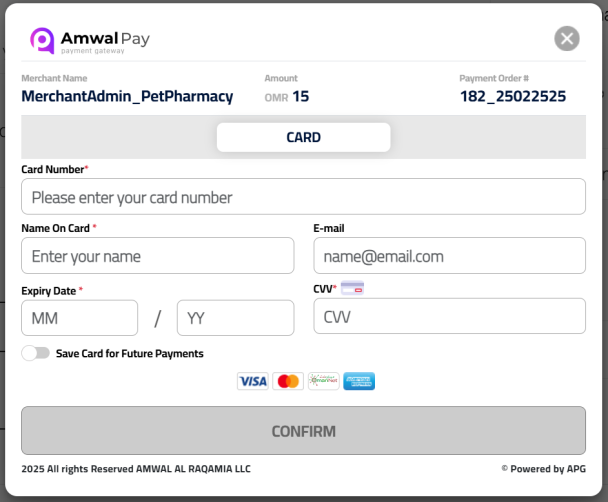
- AmwalPay’s hosted checkout ensures PCI-compliant processing of sensitive data.